| Last Post |

Art Love
|
|
6/18/2017 9:00 PM

|
|
Francis is planning re-installation of reconditioned air valves on his 6.3 and asked some questions via e.mail. He asked about the 3 hoses from the chassis rail to the front subframe which are different on the 6.3 from the other W109's and W112's as I mentioned early in this thread. He asked whether I blew out the airlines before installing the valves and whether I always replaced the air line seals. I would do the last two if the vehicle was being rebuilt, the lines open on the vehicle for any length of time or the lines not on a vehicle for a period [wasps love plugging small pipes etc]. Here is a copy of my reply.
The three hoses do not apply to the 6.3. The photos where they appear are from the W112 coupe. On the 6.3, unlike all the other W112 and W109, the three hoses go from the chassis rail to a bracket on the front subframe. There are three short steel pipes from the subframe bracket to the valve itself. Without going down and looking, I think it was done that way to clear the hot exhaust pipes on the V8. Changing those three hoses on a 6.3 is something that you should do when the engine, or at least the left head and exhaust manifold are out for some other reason. They are even worse to deal with with the motor in place than they were for me on the 3L coupe. On my 600, there was even less room and I have never changed them, even though I bought a new set of hoses when we did the air suspension on it!
Having 7 steel pipes to engage in the left front valve on the 6.3 is why it is the most tedious to replace. I did it last time, not all that long ago, on #765 when I had a set of valves from Martin for that car. I did note on the website at the time that Jim Jones at Three Point offered me the use of one of his hoists. Doing it on the hoist compared to with the car on the ground or on stands made a huge difference, but it was still a fiddle. I did it before that on #2509 with that car on my stands. That was not as bad as #765 because #2509 had not been touched since 1988 and may not have had the valve removed and replaced prior to that, so the pipe alignment was as good as it could be. I always start with the high position lines to the top of the valve. They screw into brass and are the most likely to be cross threaded if you are not very careful. they are also the most tedious to reach. It is important with the pipe across to the right front valve, to undo the screws that hold the brackets and rubber guides on each side of the front subframe. That gives you a little more wriggle on that cross pipe. Another thing to consider, if you are having a lot of trouble with the bellows B line, is to undo it from the bellows tank at the front which gives it some wriggle. Once you have it sound in the valve, it is easier to re-engage in the bellows tank at the front where there is more room than trying to align it at the valve end. You can’t get to the rubber guides where it goes behind the brake backing plate over the control arm to loosen it there. If my memory is correct, I do the three lines at the bottom of the valves last, the farthest one first, followed by the B line in the middle and then the outermost. That gives the best access for the spanners. The other thing that is important is to engage the two bolts that hold the valve to the front subframe bracket before you tighten any of the pipes. It is amazingly difficult to get one or both of these bolts to engage their relatively coarse threads once any of the air lines are tightly engaged. Hold the free floating valve in one hand and try to engage the bolt threads with the fingers of the other. You might have to rotate the valve somewhat on its longitudinal axis to get the second bolt in, so try to get one to engage and then rotate the valve if necessary to engage the second.
I don’t envy your doing this with a bad shoulder. You will need the car on the highest stands with the wheel off and the steering free so that you can turn it to give better clearance for the spanner from the tie rod which is always in the road no matter what. There is really no room for a second person unless the car is on a hoist, so having your son help will mean your telling him what to do and trusting his strong hands.
I have not blown out the lines. Having the ends clean is all I have done. I have also not always changed all the seal washers. I did the first time I did any of the cars, but if I re-did the job, I often reused the existing washers, because I knew when I put them in and that they were the correct washer. They tolerate a couple of compressions and I have not had leaks.
That is all I can think of at the moment. Get back to me if you run into trouble. Allow a couple of hours and stop and have a break if you are getting frustrated.
Art
|
|
|
|
Art Love
|
|
6/18/2017 5:51 AM
|
|
I have made this topic "sticky", because it is basically a technical article, despite some distractions toward the end. The fact that it has been read about 9000 times despite being buried for two years and I am currently being asked about detail in it seems to warrant the move. It also contains input from Chris Johnson which is always worth reading. Chris has not posted for a couple of years which is a great loss. If anyone has any objection, please let me know.
Art
|
|
|
|
6.3Nut
|
|
6/21/2015 11:41 PM
|
|
Thank Paul for your help. Whew for a moment my heart stopped beating[:D]
There cars and then there are BABIES!
1969 Euro Model
10901812000931
|
|
|
|

paul-NL
|
|
6/21/2015 11:26 PM
|
|
I must admit, you have an for the Belgium market produced car.
|
|
|
|
6.3Nut
|
|
6/21/2015 5:18 PM
|
|
I have the card, I can send it to you if it helps clear up the mystery.
There cars and then there are BABIES!
1969 Euro Model
10901812000931
|
|
|
|
paul-NL
|
|
6/21/2015 4:47 PM
|
|
When we talked about "euroversion" in the past, then it mostly went about the POWER output from the motor.
All cars until Vin 109-018-12-002840 have the stronger euroversion motor, which has a higher compression ratio,
From that VIN 002840 all the US-delivered cars had an reduced compressionratio with less power.
When you have the datacard, then you can see in the codes if you have a US-spec car or elsewhere ..
|
|
|
|
6.3Nut
|
|
6/21/2015 4:38 PM
|
|
It is the chromed version, as per your picture. I might be wrong, but I think someone mention that early models were euro models disguised as US models.
There cars and then there are BABIES!
1969 Euro Model
10901812000931
|
|
|
|
6.3Nut
|
|
6/21/2015 4:22 PM
|
|
Paul, the date is correct, but I am not sure about the original buyer. As for being US-Delivered I am not sure as it has all the features of euro model down to the rear lamp with 5 bulbs and the front headlight with city lights in the beam. Also, I have to consult the euro model wiring schematic rater than US model.
There cars and then there are BABIES!
1969 Euro Model
10901812000931
|
|
|
|
paul-NL
|
|
6/21/2015 4:00 PM
|
No, about the look of the the "ring" from the horn on the steeringwheel ... As far as my data reaches, is yours an US-delivered car on 4 dec 1968 and the first owner was Mr J D Zink .... I have in your case no info about the colour nor from the interior ... US-version 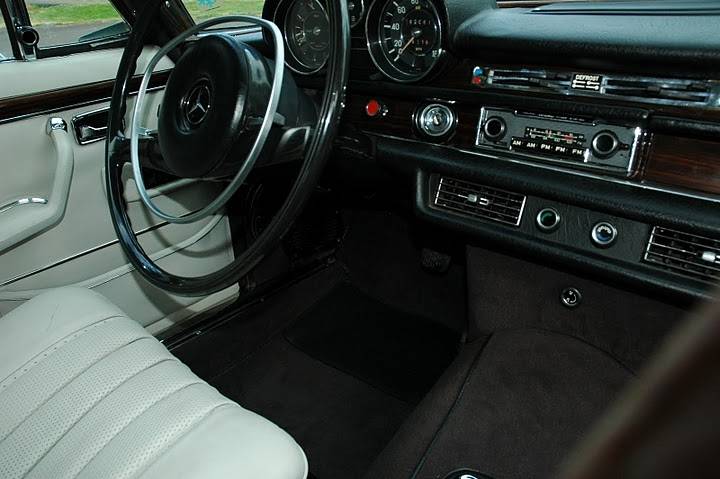 non-US-version (chromed) 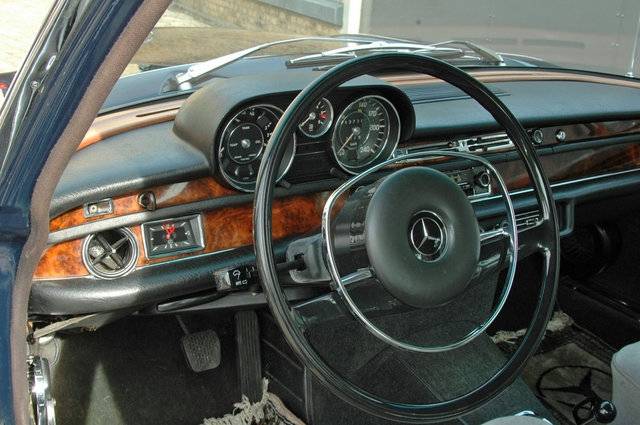
|
|
|
|
6.3Nut
|
|
6/21/2015 3:35 PM
|
|
Sorry Paul, for the ignorance but what is a claxonring?
There cars and then there are BABIES!
1969 Euro Model
10901812000931
|
|
|
|
paul-NL
|
|
6/21/2015 3:30 PM
|
|
Do you have a chrome claxonring or a mattsilver ??
|
|
|
|
6.3Nut
|
|
6/21/2015 3:01 PM
|
|
Yes this is exactly what I have.
There cars and then there are BABIES!
1969 Euro Model
10901812000931
|
|
|
|
paul-NL
|
|
6/21/2015 2:37 PM
|
|
|
|
|
|
6.3Nut
|
|
6/21/2015 5:22 AM
|
|
Yes Paul-NL I will send you a picture. I might be wrong, but what is the difference between "Euro Model" and US-delivered?
Art thanks for the response.
There cars and then there are BABIES!
1969 Euro Model
10901812000931
|
|
|
|
Art Love
|
|
6/21/2015 2:29 AM
|
|
Sorry, I have been away for a few days. M-B supply a "plastic" ball joint in "recent" years rather than the original metal ones. I have not bought any new rods and have preferred to buy steel ball joints, L and RH thread from a hardware supplier than to use the "plastic" ones. The only reason I can think of as to why the rod would be about a 1/4" shorter is because the plastic socket ends are longer than the original steel ones. The thing that matters is the length between the centres of the ball joints.
Art
|
|
|
|
paul-NL
|
|
6/21/2015 12:09 AM
|
|
Could I get pictures from 000931 for our registery ??
What do you call a "euro"model ??; you own defenitly an US-delivered car.
|
|
|
|
6.3Nut
|
|
6/20/2015 11:21 PM
|
|
Hey Art, I just received a new set of rod and ball joints for the rear leveling valve. The ball joints are new shape but the thing that surprised me was the the shorter length of the rod by about 1/4". I would not be replacing the joints had they not been so looooooooooose, they pop out. Any way, have you ordered a rear rod recently and have you noticed the diff., if you have does it make any difference?
There cars and then there are BABIES!
1969 Euro Model
10901812000931
|
|
|
|
6.3Nut
|
|
6/15/2015 2:42 AM
|
|
Art, do you think it would be better if, under 6.3, you create a folder "Valve Maint." or something better and then put this valuable topic under there?
There cars and then there are BABIES!
1969 Euro Model
10901812000931
|
|
|
|
6.3Nut
|
|
6/15/2015 2:19 AM
|
|
Thanks Art. Sticky is a good idea specially for the valve, it is a topic that is very useful. I fully subscribe to the Sticky idea
There cars and then there are BABIES!
1969 Euro Model
10901812000931
|
|
|
|
Art Love
|
|
6/15/2015 1:34 AM
|
|
OK, Justin and I use 3M Brake Lube anti-Sieze Compound. It comes in a can with a screw top that has a brush fitted to the top, like the similar Rubber Glue cans from M-B and Wurth. I use it everywhere on threads. You should be able to get it because my can says made in the USA at the 3M Automotive Trades Division in St Paul. Part number on the can is 08945.
Art
P.S. There is a photo of the can on page 2 of this thread.
I also wondered if I should make this thread "sticky" so it stays at the top of the 6.3 Forum and is easy to find. I have tried to do that with other technical threads that are read several thousand times. This has been criticized by one member, but seems useful. Input regarding this would be appreciated.
|
|
|
|